This is the easiest Artisan Bread recipe. You can make all kinds of breads, rolls, pizza crusts and buns out of this recipe. This is the dough that I use for making pizzas. It makes a fabulous crust. The dough is no-knead. It requires only five ingredients and one of them is water. This recipe is very budget friendly and the dough will store in the refrigerator for up to 14 days.
Ingredients:
1 1/2 Tbs. Yeast
1 1/2 Tbs. Salt
6 1/2 C All -Purpose Flour
3 C Lukewarm Warm Water (100* to 105*)
Cornmeal For Dusting
Directions:
In a large bowl, mix yeast, water and salt. Stir in flour and mix until there are no dry patches. The dough will be quite wet. Loosely cover and let sit in a warm place for 2 to 5 hours. I prefer 5 hours, but I have used the dough after 2 hours. After this resting time the dough is ready to be baked or it is ready to be stored in the refrigerator.
 |
| I dust the top with flour and take out what I need by hand. I store the rest in the refrigerator. |
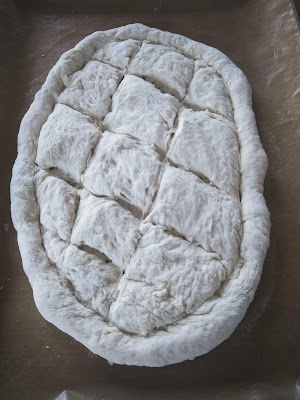 |
| Prepare baking pans with oil and dust with cornmeal. With flour dusted hands I stretch or press the dough into the shape I desire. If pressing the dough, like I did for this particular loaf, press it on the prepared baking pan that you are using. Do not knead. Just stretch to make a smooth surface. Before I bake the dough I make a slit or design in the bread with a very sharp knife. This allows the bread or loaf to rise without bursting open and gives it that familiar artisan bread look. |
 |
| Let the formed dough rise for about 40 minutes. Place an empty baking pan on the bottom rack of your oven. Pre-heat the oven to 450*. |
 |
| When the dough is ready to bake place it on the middle rack and add 1 cup of water to the empty pan. Do this as quickly and safely as possible and close the oven door. The steam will create a very crusty bread on the outside and a very soft crumb on the inside. Bake until well browned. |
 |
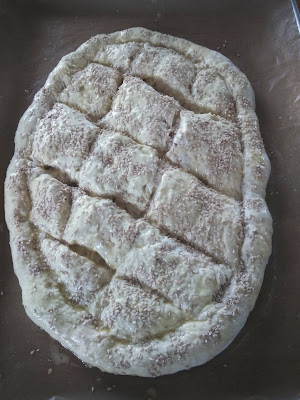
| I used a small cast iron skillet for this loaf. If you are not using a topping such as sesame seeds then after the dough has risen make a slit or design into the dough and dust with flour. |
 |
| This loaf is ready for the oven. |
 |
| This loaf has finished baking. |
 |
| Closer view. |
 |
| Let's get back to this loaf that is ready for the oven. |
 |
| Place on middle rack and |
 |
| pour in one cup of water in the bottom pan and close the oven door. Do not peak and let the steam out. |
 |
| Side view. |
 |
| We just pulled off pieces to eat with our meal. |
 |
Let cool on wire racks and cover with a clean cloth. Do not slice bread until cool. It will crush the crumb. If you want hot bread then re-heat the bread or use the pull apart method.
|
In communities that use large communal wood fired ovens, bakers have their own signature designs to let them know which loaves belong to them, such as letters, numbers or characters. Don't be afraid to create new designs or signature marks for the different types of loaves that you bake. Just have fun.
All of this dough costs less than $1.80 to make. So, I have to place this recipe in the "Struggle Meals" category. For a complete break down of the cost see my post on "Struggle Pizza" found here:
https://roamingbuffaloranch.blogspot.com/search/label/PizzaIf you are using cold dough out of the refrigerator you use the same techniques. The dough is a little stiffer, so you can let it sit out for 5 or 10 minutes before forming it into a loaf.
Imagine fresh baked bread everyday without having to make bread everyday...
Enjoy,


This recipe is Amazing! I am So thankful to be reminded of it again, as I personally know Mrs. Smith, and lived off the grid like her just a few miles away, (years ago), and we cooked together often!
ReplyDeleteI guess it's time to start baking fresh bread again, so much more healthy and economical!
@Runaway Girl... I miss cooking and hanging with you too. Love your name...
DeleteThis comment has been removed by the author.
ReplyDelete