Showing posts with label Artisan Bread. Show all posts

Monday, March 11, 2024

Refrigerator Dump Pizza - Artisan Bread Recipes

I finally felt well enough to put together a loaf of Artisan bread. I also made yummy chicken pizza out of the same dough and leftovers. I have not baked bread for a month. Our meals have been very basic for over a month now. Shingles have literally taken all of my energy out of me. You can find my recipe here: Artisan Bread/Pizza Dough 


My body finally burned the sickness out with a fever a couple of nights ago. I am still not 100%. Not even close, but I have hope. My energy level is non-existent. The no-knead bread was just the ticket I needed to put bread on the table. The pain is starting to diminish. I am using a brace to help control it. I wasn't able to use the brace until the rash was almost cleared up. I am really hoping that the nerve pain leaves my body soon. 

I was not up to making up a batch of pizza sauce, so I used leftovers from the fridge to create this pizza. I used up the last of the rotisserie chicken from Sam's, homemade turkey bacon bits, minced garlic, red pepper flakes, melted butter, chopped orange bell peppers and grated cheese on the pizza. I had all the ingredients in the fridge ready to go. I stole the chopped peppers out of some leftover salad. All I had to do was use my imagination and put it together for a much-needed meal. I served it with leftover salad minus the peppers, LOL.

The pizza smelled wonderful while baking. I used a lot of minced garlic and butter. I was not hungry, but I managed to eat one slice and a bite. I skipped the salad; I had one for lunch. The pizza would have been just as good without the meat. I hope to make this again perhaps as a side for soup. 


Enjoy,

Mrs. Smith

Sunday, August 21, 2022

Cinnamon Raisin Artisan Bread - No Knead Recipe...


This recipe is so simple. I made two loaves, one cinnamon raisin and one plain using the same dough recipe. Baking two or more loaves at once saves us time, money and energy.  

Beautiful loaves with wonderful flavor.
Ingredients:
3 C All Purpose Flour
2 Heaping Tsp Cinnamon
1/4 C Brown Sugar
1 Tsp Salt
1 Tsp Yeast
2/3 C Soaked Raisins (Soaked 20 minutes in very warm water and drained.)
1 1/2 C Warm Water

Directions:

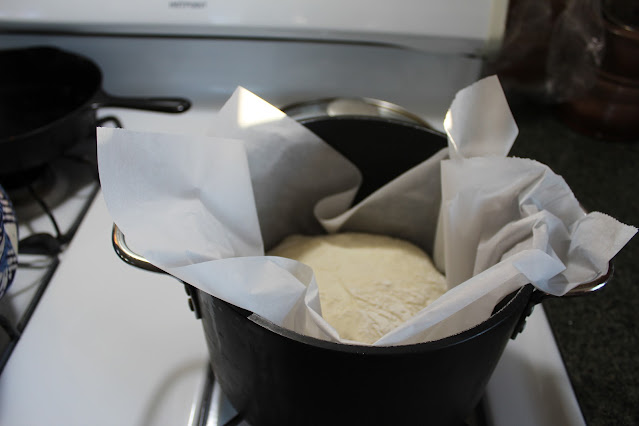
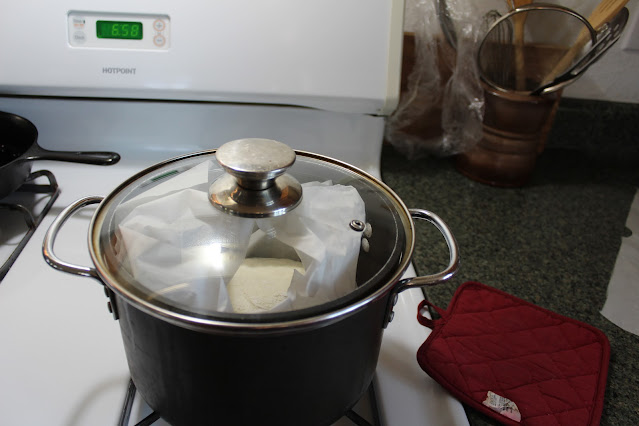
Mix dry ingredients together in a large bowl. Add soaked and drained raisins along with warm water to dry ingredients. Mix with a sturdy spoon until fully incorporated. Do not overmix. Dough will be sticky. Cover dough with plastic wrap and let rise 8-12 hours or overnight. Pre-heat oven to 450 degrees along with your Dutch oven and lid for 30 Minutes. While the oven and Dutch oven is pre-heating, dust countertop with flour and pour dough out. Dust top of dough with flour and fold dough into a loosely formed ball. Do not knead the dough. Let rest until oven and Dutch oven are pre-heated. Remove Dutch oven from oven. Be careful, it will be really hot. Remove lid. Place loose dough ball in the center of a large sheet of parchment paper. Place dough in the Dutch oven. Put lid back on and place in the oven. Bake for 30 minutes, then remove lid and bake for another 15 minutes. Remove loaf from pot and let cool on a wire rack for at least 20 minutes before slicing. 

Notes: 
For a plain loaf of bread, omit cinnamon, brown sugar and raisins. 
Bake two loaves at a time to save on energy.
Other dried fruits like cranberries, blueberries or dates can be used instead of raisins.
I used my 3 and 4 quart heavy pots with lids to bake in and they worked just fine. My Dutch oven is simply too big to bake in for this recipe. 
 
I made two kinds of loaves.

Sticky cinnamon raisin dough.

First cup of tea for an early start to the day.

Sticky plain dough.

This recipe also works in a very cool kitchen. 

Loosely formed dough balls.

Dough on sheets of parchment paper. 

Gently place dough into hot pot or Dutch oven.

Don't forget to put the lid back on before baking,

Cinnamon Raisin Loaf.

Plain Loaf.

We had freshly baked bread with cream cheese for breakfast.


Enjoy!
Mrs. Smith


Tuesday, June 7, 2022

Artisan Breads...Struggle Meals...Recipe...

This is the easiest Artisan Bread recipe. You can make all kinds of breads, rolls, pizza crusts and buns out of this recipe. This is the dough that I use for making pizzas. It makes a fabulous crust. The dough is no-knead. It requires only five ingredients and one of them is water. This recipe is very budget friendly and the dough will store in the refrigerator for up to 14 days. 

Ingredients:

1 1/2 Tbs. Yeast

1 1/2 Tbs. Salt

6 1/2 C All -Purpose Flour

3 C Lukewarm Warm Water (100* to 105*)

Cornmeal For Dusting 

Directions:

In a large bowl, mix yeast, water and salt. Stir in flour and mix until there are no dry patches. The dough will be quite wet. Loosely cover and let sit in a warm place for 2 to 5 hours. I prefer 5 hours, but I have used the dough after 2 hours. After this resting time the dough is ready to be baked or it is ready to be stored in the refrigerator.


I dust the top with flour and take out what I need by hand. I store the rest in the refrigerator. 

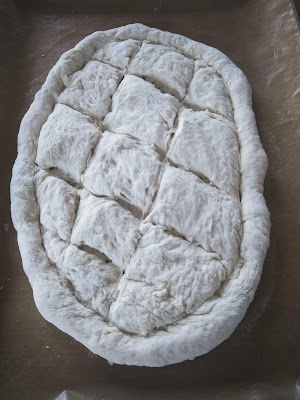
Prepare baking pans with oil and dust with cornmeal. With flour dusted hands I stretch or press the dough into the shape I desire. If pressing the dough, like I did for this particular loaf, press it on the prepared baking pan that you are using. Do not knead. Just stretch to make a smooth surface. Before I bake the dough I make a slit or design in the bread with a very sharp knife. This allows the bread or loaf to rise without bursting open and gives it that familiar artisan bread look.

Let the formed dough rise for about 40 minutes. Place an empty baking pan on the bottom rack of your oven. Pre-heat the oven to 450*. 

When the dough is ready to bake place it on the middle rack and add 1 cup of water to the empty pan. Do this as quickly and safely as possible and close the oven door. The steam will create a very crusty bread on the outside and a very soft crumb on the inside. Bake until well browned. 

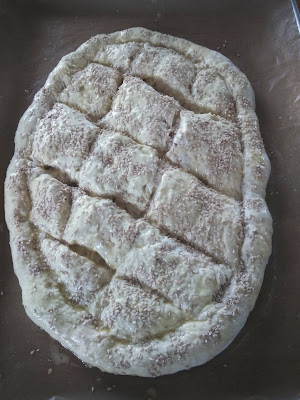
I used a small cast iron skillet for this loaf. If you are not using a topping such as sesame seeds then after the dough has risen make a slit or design into the dough and dust with flour.

This loaf is ready for the oven. 

This loaf has finished baking.

Closer view.

Let's get back to this loaf that is ready for the oven.

Place on middle rack and

pour in one cup of water in the bottom pan and close the oven door. Do not peak and let the steam out. 


Side view.

We just pulled off pieces to eat with our meal.

Let cool on wire racks and cover with a clean cloth. Do not slice bread until cool. It will crush the crumb. If you want hot bread then re-heat the bread or use the pull apart method.


In communities that use large communal wood fired ovens, bakers have their own signature designs to let them know which loaves belong to them, such as letters, numbers or characters. Don't be afraid to create new designs or signature marks for the different types of loaves that you bake. Just have fun.

All of this dough costs less than $1.80 to make. So, I have to place this recipe in the "Struggle Meals" category. For a complete break down of the cost see my post on "Struggle Pizza" found here: https://roamingbuffaloranch.blogspot.com/search/label/Pizza

If you are using cold dough out of the refrigerator you use the same techniques. The dough is a little stiffer, so you can let it sit out for 5 or 10 minutes before forming it into a loaf.
 
Imagine fresh baked bread everyday without having to make bread everyday...

Enjoy, 
Mrs. Smith


Winter Preps - Stocking Up the Freezer