Showing posts with label Homemade. Show all posts

Sunday, September 7, 2025

Sweet Sourdough Bread

Years ago, I used to make a bread using a starter given to me by my wonderful mother-in-law. It is a fermented bread like sour dough only it is fed with sugar and instant potato flakes. This bread is also more forgiving that sour dough. 


I recently ran across my recipe to make my own starter. It was a success. As the starter ages, it will develop a stronger fermented flavor just like the one I used to use. Unlike sour dough bread, this bread is sweet. 

I just fed the starter. It reacts quickly and bubbles away.

Now it's ready to make bread.

1 cup of starter is all it takes.

And the dough goes wild.


Once formed into loaves, it bolts again.

Even in the oven, this dough continues to grow.

It's amazing what one cup of starter can do.

To make the starter:

1 Pk instant yeast (2 1/4 teaspoons)

3 Tablespoons instant mashed potatoes

3 Tablespoons white sugar

1 Cup warm water


Directions:

Mix dry ingredients in a glass bowel or jar. Add warm water. Mix until dissolved. Cover loosely with a cloth and rubber band or an unsealed lid. (It will explode if sealed) Let sit on the counter for 5 days. Stir mixture every day. 

On day five, feed the starter: (Feed the starter every 5 days)

3 Tbs instant mashed potatoes

3 Tbs white sugar

1 Cup warm water

Let sit loosely covered on counter for 6 to 8 hours. I do this step in the morning. After that time, stir the starter and remove once cup of the starter to make bread with and store the rest of the starter in the refrigerator. In the evening, I make the dough and let it rise overnight.

To make the dough:

1 C active sourdough starter

1 1/2 C lukewarm water

1/2 C vegetable oil

1/2 C white sugar

1 1/2 Tsp sea salt or kosher salt

6 C all-purpose flour or bread flour


In a large glass bowl, add warm water, starter and oil. Mix well. Add sugar and salt. Mix well. Add flour 1 cup at a time mixing well after each cup. This can be done in a stand mixer. Once all of the flour is incorporated, pour dough out onto a floured surface and knead until a smooth dough ball forms. The dough will be slightly sticky. Place the dough into a lightly oiled glass bowl. Lightly oil the top. Cover and let rise 4 to 8 hours. I let my dough rise overnight. 

Punch dough down and knead for 3 minutes, Divide dough into 2 parts. Form dough into loaves and place in oiled bread pans. Oil the tops and cover. Let rise until doubled in size. Bake in a pre-heated oven at 350* for 35 to 40 minutes until golden brown. Remove from pans and let cool on a rack completely before slicing.


Notes:

Do not use metal utensils or bowels.  Just like in all fermenting processes all bowls and utensils must be meticulously clean. 

I use a quart size wide mouth canning jar to make and store the starter in. Canning jars are easily sterilized and are an easy option to store and mix the ingredients in. 

Let the dough work overnight while you sleep. No late-night baking stealing from my precious sleep.

It's not just for bread! Starter can be used in pancakes, muffins, rolls, cinnamon rolls or discarded after the feeding process. 

Plan ahead! It's worth it...


Enjoy,

Mrs. Smith


Tuesday, July 29, 2025

High Altitude Homemade Cheesecake Recipe

Number One Husband decided that he wanted to try baking a cheesecake. He decided on a New York style cheesecake. I helped out a bit. We had both been out in the sun for hours replacing a coolant distributer on our vehicle. Ugg, what a job that turned out to be. We were hot and tired and dirty afterwards. I wore flip flops and burned my toes and the tops of my feet. I put on a long sleeve shirt and a hat before I burned anywhere else, but I didn't take my feet into consideration.

Number One Husband asked me to put out the ingredients that needed to be room temperature in the morning, so there was no changing our minds about baking the cheesecake. It had to be done. We both got cleaned up and rested a bit before taking on the cheesecake.


Baked graham cracker crust.

Cream cheese filling. 


The cheesecake took 10 hours to cool and another 8 hours
to chill in the refrigerator.

Lovely, just lovely.

We are ready to have our first slice.


I made homemade whipped topping.

I'm glad that he wanted to try making it. He did a fantastic job.

This rich and thick cheesecake is by far the best cheesecake that I have ever had. I could not eat a whole slice. It was just too rich for one sitting for me. The whipped cream was delicious too. I made extra for Chai and hot chocolate. What a special treat. 

I sliced the rest of the cheesecake and topped it with whipped cream. I then placed the slices in the freezer to freeze before wrapping each slice individually. I think that I will make some chai and top it with whipped cream this evening. 

10-inch high-altitude New York Style Cheesecake recipe
 
Cheesecake recipes, especially the classic New York style, generally don't require major adjustments for high-altitude baking, unlike many cakes and quick breads. The primary difference is often a slightly longer baking time and careful attention to the cheesecake's internal temperature to ensure its cooked through. 
Here's a guide to making a delicious 10-inch New York style cheesecake at high altitude: 
Key Considerations for High Altitude Baking 
  • Baking time: Expect the baking time to be a little longer at high altitude.
  • Doneness: The most reliable method to determine if your cheesecake is fully cooked at high altitude (or any altitude) is to check its internal temperature with an instant-read thermometer.
  • Oven Temperature: You might consider slightly lowering the oven temperature to ensure the cheesecake bakes gently and avoids cracking, though some sources suggest increasing it for faster setting.
  • Water bath (Bain-Marie): This is a crucial element for New York cheesecake, helping to create a moist and creamy texture, and preventing cracks. It is especially helpful at high altitude as it helps slow down the baking process and prevents the cheesecake from drying out. 
High-altitude 10-inch New York Style Cheesecake recipe 
Here is a general recipe for a 10-inch New York Style cheesecake, with modifications and tips to consider for high altitude: 
Ingredients 
Crust: 
  • 2 cups graham cracker crumbs
  • 1/2 cup (1 stick) unsalted butter, melted
  • 1/4 cup granulated sugar 
Filling: 
  • 4 (8-ounce) packages cream cheese, softened at room temperature
  • 1 3/4 cups granulated sugar, according to King Arthur Baking, high-altitude bakers should consider reducing sugar by 1 tablespoon per cup, so start with 1 3/4 cups and reduce if needed
  • 3 tablespoons all-purpose flour (King Arthur Baking suggests increasing flour slightly, especially for higher altitudes, to strengthen the cheesecake's structure)
  • 1 teaspoon vanilla extract
  • 1/4 teaspoon salt
  • 2 teaspoons lemon juice (optional, for a hint of brightness)
  • 1 cup sour cream, at room temperature
  • 4 large eggs, plus 1 egg yolk, at room temperature. Adding an extra egg or yolk can be helpful at high altitude to add moisture and stabilize the cheesecake's structure. 
Instructions 
  1. Prepare the Crust:
    • Preheat oven to 350°F (175°C).
    • Combine graham cracker crumbs, melted butter, and sugar. Mix well.
    • Press the mixture firmly into the bottom of a 10-inch springform pan.
    • Bake for 10-15 minutes, or until lightly browned and set. Let cool completely.
  2. Prepare the Water Bath (Bain-Marie):
    • Tightly wrap the bottom and sides of the springform pan with two layers of heavy-duty aluminum foil to prevent water from seeping in.
    • Place the wrapped springform pan inside a larger roasting pan.
    • Boil water in a kettle and have it ready.
  3. Prepare the Filling:
    • In a large bowl, beat the softened cream cheese with the granulated sugar and flour until smooth. Scrape the bottom and sides of the bowl frequently to ensure no lumps remain.
    • Add the vanilla extract, salt, and lemon juice (if using). Mix until combined.
    • Add the eggs, one at a time, mixing on low speed until just incorporated. Do not overmix.
    • Gently stir in the sour cream.
  4. Bake the Cheesecake:
    • Pour the filling over the cooled crust in the prepared springform pan. Tap the pan gently to release air bubbles.
    • Carefully place the roasting pan containing the cheesecake into the preheated oven.
    • Pour the boiling water into the roasting pan, ensuring it reaches halfway up the sides of the springform pan, taking care not to get water into the cheesecake batter.
    • Bake at 300-325°F (150-165°C) for 1 hour 30 minutes to 2 hours, or until the edges are set and the center still jiggles slightly when nudged. Baking time at high altitude might be longer.
    • For a fool-proof method, check the internal temperature of the cheesecake. Insert an instant-read thermometer into the center, about two inches deep. The cheesecake is done when it reaches 145°F (63°C), and will continue to cook as it cools.
  5. Cooling and Chilling:
    • Turn off the oven and let the cheesecake cool in the water bath within the closed oven for an additional hour or two, or until the center is set. This gradual cooling prevents cracking.
    • Remove the cheesecake from the water bath and roasting pan. Carefully remove the foil. Let it cool completely on a wire rack at room temperature.
    • Cover and refrigerate for at least 8-10 hours, preferably overnight, to allow the cheesecake to firm up and fully set.
  6. Serving:
    • Remove the cheesecake from the springform pan.
    • Serve plain or top with your favorite toppings like fresh berries, fruit sauce, or whipped cream.

I just found out some really good news last night. My really good friend, Ms. M, that moved away several years ago has purchased a home about 45 minutes away. Yea! I am very happy for her and am excited to be able to hang out again. If the timeline works out, I may be able to keep her little dog while she is moving.  


Shalom,
Mrs. Smith

Thursday, July 10, 2025

Homemade Tamales

I did it! I made homemade tamales. I only took a few pictures because I was not prepared to do a tutorial of the whole process. It turns out that it hit a whopping 90 degrees yesterday. I planned on steaming the tamales late in the evening, but it didn't matter. It was hot and I was hot and a bit fussy.

I started by preparing the homemade chicken broth early in the morning. I planned on doing this in the sun oven; however, our clear sunny forecast tuned into an unplanned 90-degree cloudy day. At 11 pm last night it was still 80 degrees inside the house and 70 degrees outside. Due to the lack of sunshine, we had to run the generator with the windows closed until bedtime. 


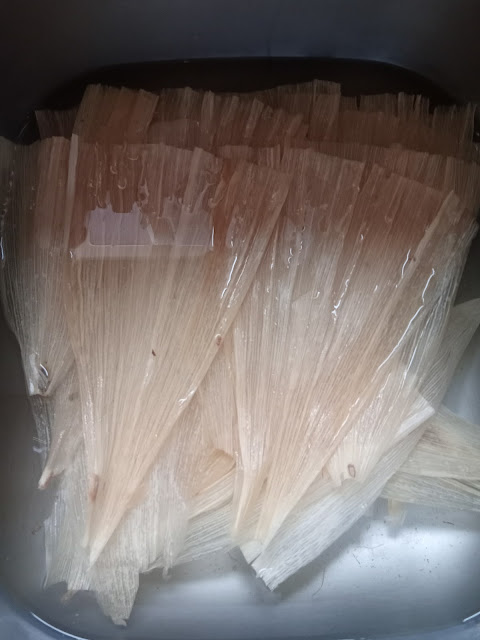
Soaking corn shucks

Blurry picture of the green chili sauce

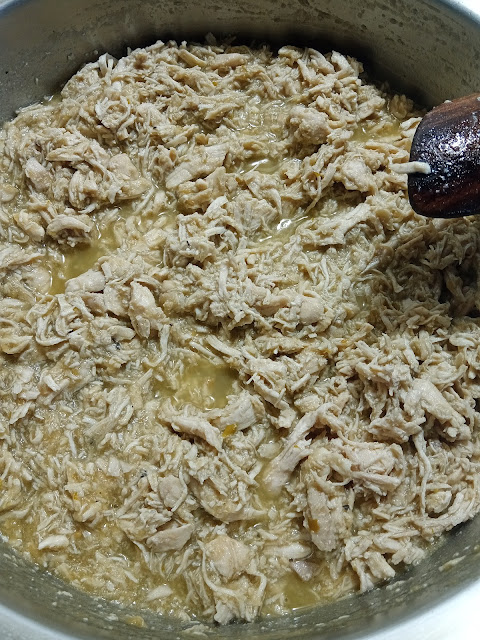
Shredded chicken breast

Green chili chicken filling cooking together

Preparing the masa. 

Dry ingredients

This is the steamer that I used. Number One Husband has picked
out a tamale steamer. I imagine he will be buying it soon.

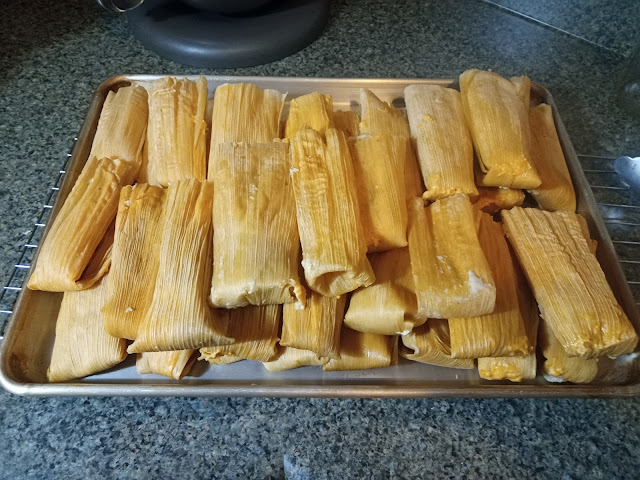
The tamales are finally done.

I ended up with 34 tamales.

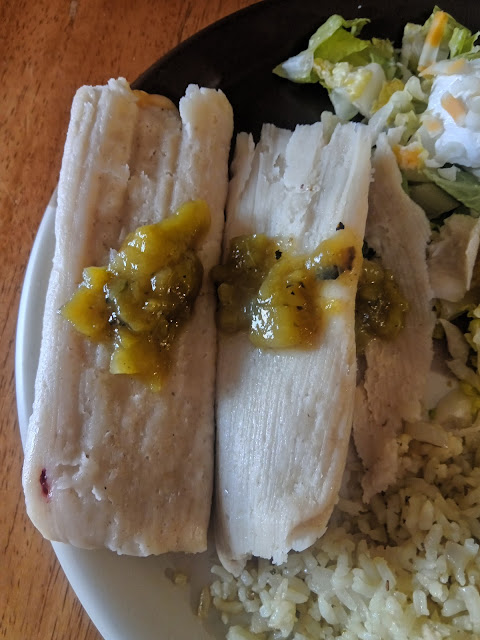
We made green tamales using pepper jack and Colby jack cheeses. 

Now that I know what to expect I can streamline the process of making tamales. I will share the step-by-step instructions the next time I make them. The tamales turned out delicious! Very flavorful. We tried a couple before packaging them. 

Lunch


I have to laugh about it now that it's over. I was so hot and frustrated. Number One Husband was trying to be helpful, but I just wanted to get it done. I had a giant mess. Chunks of masa were flying out of my mixer. There was a lot of masa in this recipe. I had to finish the masa by hand. 

The melted cheese stuck in the tiny holes in the steamer. I had to use a toothpick to clean the cheese out of the holes. As you can see the steamer is huge. Having the right tools would have made this task a lot easier, but it was worth it. I was ready for bed once the clean-up was complete, and the house cooled down. I slept like a baby. 


Shalom,

Mrs. Smith 


Monday, July 7, 2025

Homemade Taquitos

When I was a kid, we lived in the mountains below Yosemite. As a child, I rarely went into the city. I can remember on one of those trips stopping at this little roadside place that sold taquitos. They had this green sauce that I later learned was guacamole. I was probably five or six. They were absolutely delicious. 

As an adult, I still love them. I have not found a restaurant that serves them. I found one obscure restaurant hundreds of miles away that serves Flautas. Flautas are flour tortillas, not corn, that are stuffed with various fillings. Good, but not the same. The ones that can be purchased in the grocery store cannot compare to fresh hot handmade taquitos. 

When I started making homemade corn tortillas, I decided to try making my own homemade taquitos. I have made green chili chicken and beef so far. Both were very good. As I continue to perfect my recipe and techniques, I will share what I have learned here on the blog. 

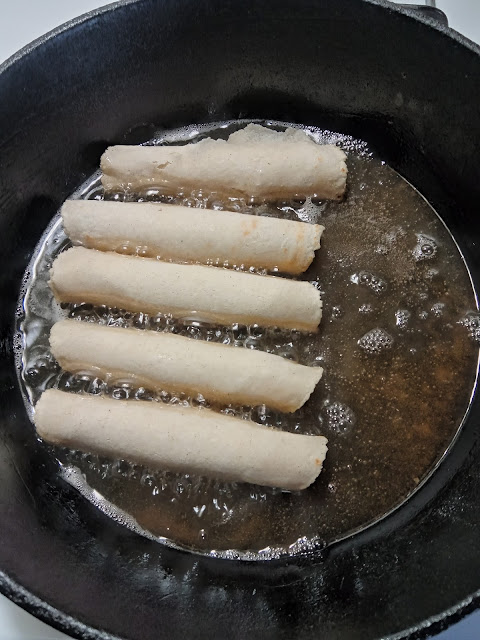
I made 19 corn tortillas and rolled them into beef taquitos. I froze
them on a tray and then bagged them up. 

I cooked five frozen taquitos.

They turned out beautifully. Now that I know that I can
batch freeze them, pull them out when I want and
cook them frozen I will be stocking up on them.

I made a green chili lime sauce to serve with the taquitos.

Delicious, absolutely delicious!

Making tamales is on my bucket list. I just picked up corn husks and masa. There is a lady and her daughter that makes them in the city. They used to go by businesses and sell them at lunch. That's how we discovered them. We would call when we were heading into the city, place an order and we would meet the daughter. I'm not sure if their business survived the pandemic or not. I sure hope so. They were the best tamales! I need to practice before my friend visits in the fall. She also loves tamales. I want to surprise her with homemade tamales.  


Shalom,

Mrs. Smith

Sunday, April 20, 2025

High Protein Rotis - Duck Pond - Happenings

We received some much-needed moisture over the weekend. It filled up the duck pond. I found this little rubber duckie while metal detecting a few weeks ago. I found this and a couple of tennis balls down by the river. None of which are metal. 

The duck floated probably over 75+ miles with all the twists and turns in the river from a town that has a duck race. This little duckie got away. It is numbered on the bottom, so I know that is where it traveled from. I would say that it may not have been the fastest, but it certainly floated the furthest. I'm certain that the tennis balls were lost by dogs. People stop there and walk their dogs along the river. 

I found tools and metal cans at a park down a dirt road. It's a nice little park. It has the sturdiest of playground equipment. Fun and whimsical with bright colors for the kids along with a small horse arena and stalls. Unfortunately, it is rarely used. 


I'm still recovering, but I hope to do some baking tomorrow now that the Feast of Unleavened Bread is over. We ate the last of our Rotis made with yogurt, flour and salt. They are really good flatbreads and simple to make. Use a high protein yogurt such as Greek yogurt for a high protein bread.  

1 cup plain yogurt

1/2 Tsp salt

All-purpose flour, 3+ cups

Use enough all-purpose flour to form a soft dough. Knead for about 5 minutes. Let rest 30 minutes. Divide dough into 8 balls and roll out on a flour dusted surface. Cook in a pre-heated griddle or skillet on med-high heat until bubbles form and then then flip. Flip again after it begins to bubble again. Press bubbled areas lightly with a spatula until the roti puffs up. Remove from heat and wrap in a towel until all rotis are cooked. Serve warm. 

I made roasted garlic butter and brushed it on both sides. They were soft, pliable and easy to re-heat. These make a nice snack, a great addition to any meal or use to make your favorite wrap. 


Mrs. Smith


Tuesday, March 18, 2025

Chicken Adobo - Extending the Table Cookbook Recipe Series

Extending the Table Cookbook Recipe Series 


I finished reading through my new cookbook and decided to try a simple recipe called Chicken Adobo. I managed to drip something on it already. At least it was only water from rinsing off my hands. The tester of this recipe calls it the best chicken that he has ever ate. He also noted that it was easy to prepare. These two statements intrigued me, so I gave it a try.


I browned the chicken before I added the sauce. It gave the option
to brown it in the oven after it was cooked, but it seemed to me 
that heating up the oven was a waste of energy.

After 50 minutes, the sauce was reduced, and the chicken was tender. I
turned the chicken over several times while it was simmering to ensure
the sauce flavor was cooked into the meat.

Number One Husband and I also some made homemade egg rolls.


I love egg rolls! I froze the extras.

I served the Chicken Adobo with white rice,
Asian vegetables and an egg roll.

Number One Husband did not agree with the tester as far as it being the best tasting chicken, but he did agree that it was really good. I also liked it a lot. I must say that it is an easy recipe to make. Plain rice complements the savory salty flavors of the sauce. A little sauce goes a long way. I will definitely make this recipe again. 

I hope that you will join me again while I learn to cook basic recipes from around the world from my Extending the Table Cookbook. Most of the recipes are made from pantry staples with the exception of a few unusual spices. Rice and grains are used to bulk up meals around the world because they are more affordable than meats, therefore spices are very important flavoring for sauces, rice and beans. 

We can learn a great deal from other countries where absolutely nothing goes to waste. Hospitality is important no matter how little you have and where sharing a meal with others is a way of life. 


Shalom,
Mrs. Smith


Saturday, February 15, 2025

Homemade Hot Chocolate Mix


Add Hot chocolate mix to a cup of coffee for mocha flavored coffee.
Ingredients, plus powdered milk. I forgot the powdered milk
in this picture. 

Ingredients in Swiss Miss Milk Chocolate Flavor. 


For best results sift all ingredients together before mixing. Cocoa powder, 
corn starch and powdered milk are known to clump. 


Niddo whole milk powder is a fine powdered milk. Whole milk powder has more calories and nutrition than non-fat milk powders. For a less caloric mix use non-fat powdered milk. (I used a blend of both whole milk and non-fat powdered milk)

Mix ingredients together until well combined.


Store hot chocolate mix in an airtight container.

Add 3 Tbs of hot chocolate mix to 8 oz of boiling water and stir
until the mix is dissolved in the boiling water.

Viola! 
Ingredients:

2 C Powdered sugar
1 C Cocoa powder
2 1/2 C Powdered milk (whole or nonfat)
2 Tsp Cornstarch
1 Tsp Sea salt

Directions:

In a large bowl, sift all ingredients together and store in an airtight container.


For additional flavors, add a dusting of cinnamon or top with marshmallows. I like to make an Almond
Joy hot chocolate by adding coconut and almond syrups. This combination plus hot chocolate mix in coffee is one of my favorite coffee flavors and I don't really care for coffee, but this is a good combination of flavors. If you want a stronger or sweeter mix add more cocoa and powdered sugar to the mix. 

For homemade coffee mixes check out my post here: Homemade Cappuccino Mix And French Vanilla Coffee Mix


Enjoy!
Mrs. Smith 


Winter Preps - Stocking Up the Freezer